Best Rustic Christmas Gifts For Wood Lovers, under $100

It’s no secret that I love wood, primarily reclaimed wood, and anything rustic or farmhouse in design. In my opinion nothing can match the uniqueness and charm that comes from a piece of wood that has been around for years, possibly even decades, passed from home to home, possibly journeying from state to state or even country to country, telling a story in every scratch, dent, groove or crack that comes with the knocks of life. Like humans, mature wood carries its battle scars with pride and becomes more beautiful in character because of them. I know, I know, “it’s just wood” I hear you say, but if you are a lover of reclaimed wood then you’ll know exactly what I’m talking about.

I figured that since I had a blog and I had a reclaimed wood decor business, I might as well get onto the gift recommendation bandwagon this christmas and give my fellow wood (and rustic decor) lovers (and those that have the job of buying for them) a jam-packed list of the best rustic wood items to give (and ask for) this christmas…or next christmas…or as long as this blog post is circulating, and as long as the items are still available.

You’ll notice that all these items come from Etsy, because let’s face it, Etsy is the home of the greatest handmade, handcrafted and uniquely designed items from all over the world. Some of these items come from my shop (WoodCycle) and some come from other fabulous stores across Etsy. Wherever they come from I am sure you will agree, they are unique and beautiful. Some of them are even on SALE!

Please Note these prices are in AUD, so they will vary depending on your currency conversion rate. All information is accurate to the best of my knowledge at the time of publishing. Please refer to the stores shipping policy for information about shipping prices and times.

Rustic Christmas Gifts

This post contains affiliate links which may earn me a small commission (at no extra cost to you) should you click through and make a purchase. Affiliate links are how I keep this blog running, thank you for your support.

Under $20

These gifts are great for when the budget is a little tight or you have a lot of special people to buy for! Each one is still unique and full of character.

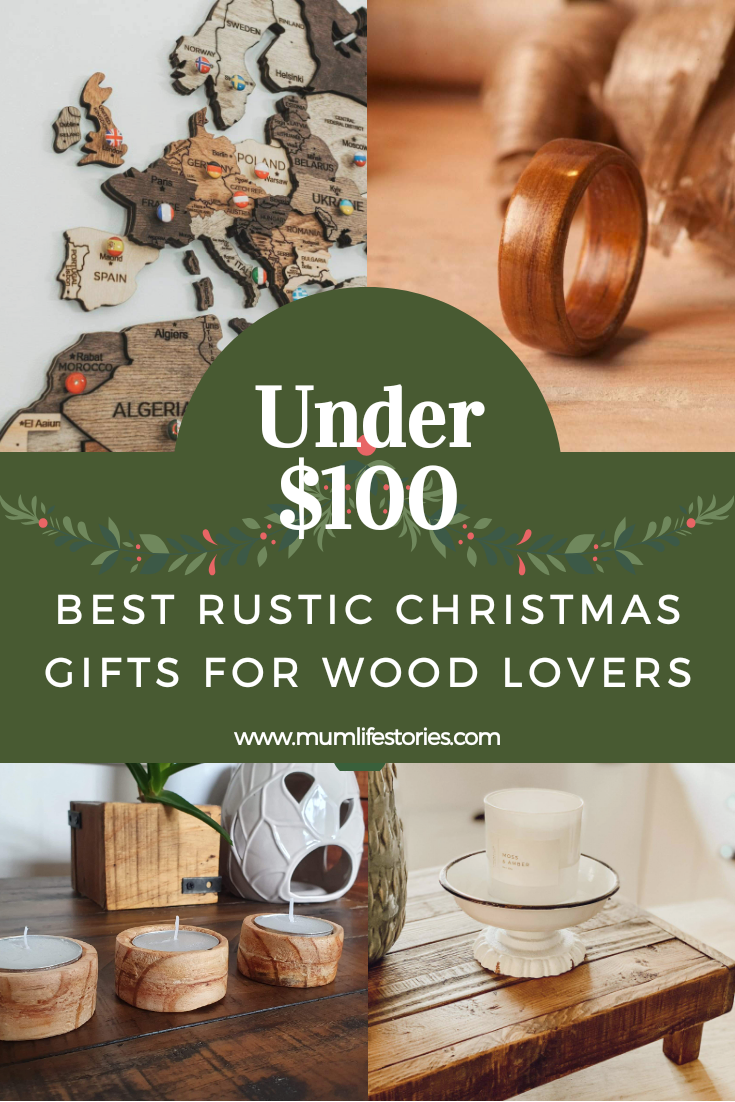
Primitive Rustic Tea Light Holder

Rustic and primitive, these tea light holders make the perfect decorative addition to your country or coastal home. Handcrafted in Australia from reclaimed wood, they ship worldwide. From just $7.99 AUD

Wood Slice Coasters

Rest your cup on the perfect rustic Coaster. Sanded smooth and finished with a light sealer to provide some liquid resistance. Eco-friendly and made in Australia, they ship worldwide. From just $22 AUD (4 pack)

Personalised Acacia Wooden Chopping Board

These gorgeous australian made chopping boards are created with the highest quality materials and workmanship. Made from acacia wood with personalized laser engraving. 12 sizes to choose from and 40+ designs, from $19 AUD. Shipped worldwide.

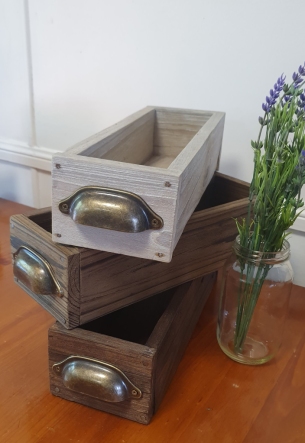
Rustic Fence Paling Planter Boxes

These Rustic Planter Boxes are handcrafted from reclaimed fence palings. Full of character and so versatile, use indoors as a table centerpiece or outdoors as a planter box, or whatever your imagination desires.

4 Colour choices, and designed with or without antique handles. Made in Australia and shipped worldwide, prices start from $17.99 AUD.

Rustic Rope Hanging Shelf

Give your walls a rustic aesthetic with these wood and rope hanging shelves. Finished in a light brown wax and perfect for holding that pot plant, tea light holder or other decor items.

Made in Bradford, UK and ships worldwide. Prices start from $13.33 AUD.

Between $20 – $50

Step things up a little with these well-priced quality items!

Photo on Wood (50% OFF)

High quality and oh so rustic, these custom made photo pallets are handcrafted in Virginia USA. Choose your photo and size (6 choices), prices start from $21.63 AUD and they ship worldwide (free delivery within the states).

Rustic/Celtic Serving Platter

Handcrafted in Australia from reclaimed wood and finished with Linseed oil and Beeswax, this Rustic /Celtic Platter will bring character and charm to any occasion. Just $39.99 AUD, ships worldwide.

Personalised Wine Glass Caddy (20% OFF)

Handmade from bamboo in Florida, USA. These wine glass caddies make a rustic addition to any picnic or dinner table. 4 styles and 2 colours to choose from, prices start from $42.45 AUD, ships worldwide, but hurry if you want it before christmas!

Rustic Fluted Timber Vase

Hand crafted from locally sourced Australian Hardwood, these ornamental vases are made for dried or artificial flowers.

Made by a local artisan wood turner from native australian trees (eucalyptus/gum/jarrah) they’ll add a natural rustic charm to any space. Priced at $49.95 AUD they’ll be sure to impress!

Made in Australia, shipped worldwide.

Rustic Wooden Candle Lantern

Carefully handcrafted in Australia from reclaimed pine wood. 8 stains and 3 sizes to choose from. Great for weddings or interior rustic/farmhouse decor.

From $30 AUD, ships worldwide.

From $50 – $100

If you really want to make a statement, these gifts are sure to impress!

Wooden World Map (60% OFF)

The perfect gift for the avid or aspiring traveler. Professionally made by craftsmen from birch plywood. Comes with push pins so you can mark where you have been or where you want to go. Featuring over four contrasting shades of wood, it is a complex and stylish wall map.

Ships worldwide from the Ukraine, from $63.10AUD, 4 Sizes available.

Rustic Chalkboard Sign

Great for the kids, or a wedding, or on the kitchen bench, this rustic chalkboard is so versatile. Choose from blank or personalised, from $64.52 AUD.

Handmade in the US, ships worldwide.

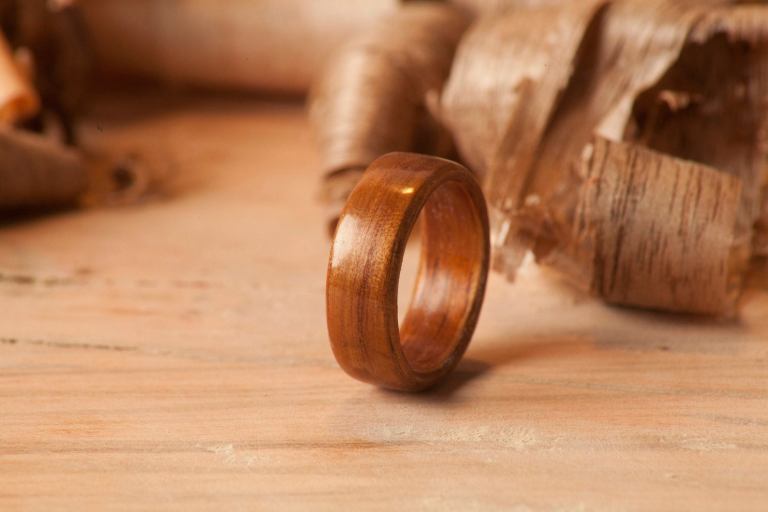
Kao Bentwood Ring (20% OFF)

This wooden ring makes a unique wedding band or accessory. Handcrafted in the US from Kao wood to your individual sizing. Comes with a tub of wax for polishing. Various widths from $74.57 AUD, ships worldwide

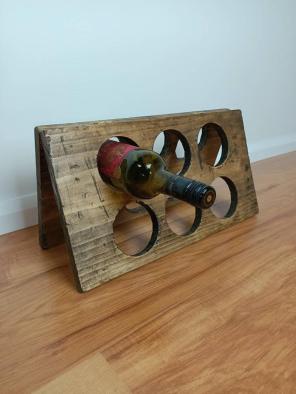
Distressed Fold-Out Timber Wine Rack

A foldable stained timber rack, nicknamed “The Drifter”. Looks great in any kitchen and can be folded away and stored for those long journeys on the open road. Holds 6 Standard sized bottles.

Hand made in Australia for $69 AUD, ships worldwide. This item is currently in low stock so move fast if you’d like one for Christmas.

January Market Rustic Wood Riser

I think these are just gorgeous. Rustic, Farmhouse, Cottage, whatever you want to call it, the charm is in the character of the reclaimed wood. With a reinforced frame, it’s sturdy and practical. Display your flowers, candles, pot plants etc in style.

Hand crafted in the US, for $86.05 AUD and shipped worldwide.

Couldn’t find anything?

If none of these gifts appeal to you, why not check out more rustic gift ideas from Etsy!

Or check out the items that post direct from your own country.

AUSTRALIA

UNITED STATES

UNITED KINGDOM

CANADA

IRELAND

Why not check out the other items available from the stores in this post?

StringybarkSupplies

PhotobookShop

TheRusticLooks

MyWoodPhoto

LeftCoastOriginal

RustDesignCo

SalAqua

EnjoyTheWood

TwoShmoopsBoutique

JWMorseDesigns

AutumnAndRose

JanuaryMarket

Thanks

Thank you for reading this blog. If you’d like to submit a story for consideration to publish, please visit our submissions page. 

Sign up HERE, or fill in the form below to be added to our email list and you will receive all the latest news, stories and promos (including giveaways and competitions) as well as a FREE Ebook exclusive to our email subscribers.

Alternatively, go to our COMPETITIONS page for info on the latest competitions!


Get your FREE Ebook

Accomplish more IN a fraction of the time

The pace and intensity of our lives, both at work and at home, leave many of us feeling like a person riding a frantically galloping horse. Our day-to-day incessant busyness — too much to do and not enough time.

With this ebook you will learn to approach your days in another way, reducing stress and getting results through prioritizing, leveraging and focus!

ebook button


WoodCycle: Reclaimed Wood Products

Hi everyone, it’s been a little while since I’ve posted anything. With so many people gaining extra “free time” with all this isolation and quarantine etc, it’s been quite the opposite for me. I had all 5 kids home all week for more than 5 weeks with the exception of the younger two being at their dad’s a few days a fortnight. The majority of the time I’ve been keeping the two rugrats occupied and entertained, and they do not understand the concept of ‘working from home’. If I dare take my focus from them and try to get on the computer or iPad, they insist they need ‘more food’, ‘more entertainment’, ‘more attention’ and just plain ‘more’, as I’m sure many, many mums (and Dads) can relate. They basically think they own my iPad anyway and so, me using it in front of them causes more drama than its worth, and my older kids commandeered my computer for their school work (until two of them returned to school this week). Apart from that, on the weekends while the little ones are away I’ve been working hard on my new business.

You’ve probably noticed a few DIY posts over the last few months, detailing instructions on how to make rustic bed heads & trays, etc from reclaimed wood. Well, I’ve enjoyed doing these projects so much that I decided to start selling them through the Facebook marketplace. My trays gained some interest, so I figured why not turn my little hobby into a business? So that’s what I have done.

WoodCycle Etsy store banner

This page contains affiliate links that could potentially earn me a commission (at no extra cost to you) if you click through and make a purchase. Affiliate links are how I keep this blog running, thank you.

Reclaimed & Rustic

Ever since I was a little girl I wanted to live in a treehouse. Not a literal treehouse, out in the backyard with one hobbit-sized room and a dangerously precarious, ladder. More like a house made almost entirely from reclaimed wood, surrounded by a forest of trees, far enough out of town that the only traffic you could hear would be the flocks of birds making their daily passings, but not so far out as to be isolated.

There is something about ‘wood’ itself, something that reminds me of what is important. ‘Realness’ and what could be more real than wood? It’s natural, it’s raw, it’s beautiful, it’s real. But wood can sometimes come across as something it’s not, if it’s milled too much, perfectly cut and polished up (much like a woman with too much makeup) it can come across as ostentatious and anything but ‘real’.

When I think of the word ‘reclaimed’ I think of wood that has been made beautiful by its experience, much like a wise old lady. Wood that is still natural and earthy, raw and real, but damaged, changed by its circumstances, full of character and charm. It’s old and used but so full of potential. All it takes is some love and care and it can be brought back to a glorious state, made even more beautiful by its brokenness and imperfections.

When I lived in Tassie I made one dream come true and finally purchased myself a king-size bed made from reclaimed wood. It was gorgeous and large and gloriously comfortable. Unfortunately, I had to sell it just a few months later to move across the country again, needless to say, I was devastated. I promised myself I would get my reclaimed wood bed back someday, somehow, but I soon realized the price tag was beyond my reach.


My First Project’s

Finished K Bedhead 1 in room (no.2 sml)

After browsing Pinterest and Instagram and seeing the amazing results people had had with pallet wood, I decided I would try and make one of my own. It took me a few weeks of procrastination but I finally got there. At first, I wasn’t sure if I could do it but once I got started, I realized it wasn’t that difficult and all it takes is a little motivation. Now I actually have something better. Something I made myself! I even enjoyed doing it so much that I decided to try and make some more things.

My second project was a serving tray like I’d seen on Pinterest. After building it however, I realized I’d made the sides of the tray too high, so it was more like a storage tray, and the idea came to me to create an insert that would make my tray versatile. Now it could be used as either a storage tray or a serving tray. I received three orders for these straight after I listed them on the Facebook marketplace.

86364350_491176148239224_1226746696730411008_n

Things got quiet after that due to many people losing their jobs and everyone conserving their money, because of difficult times. I kept making products though and decided to register my business name ‘WoodCycle’ (I thought the choice was obvious) and create an Etsy store. I have 5 products so far and am adding more all the time.

P.S. I recieved orders for around 10 trays during my Mother’s Day sale!

Sustainability

All my products are handmade with at least 70% recycled materials and I’m hoping to increase that to 90% in the next couple of years. I believe sustainability is so important these days and that we should re-use whatever we can, whenever we can.
I also use natural products as much as possible so all of my items are finished with either linseed oil, or tung oil, and sometimes beeswax. The stain is store-bought but I will be experimenting in the future with natural homemade stains also.

I currently make storage trays, serving trays, tea light holders and succulent planters. Planter boxes (including raised veggie beds and hanging planters) and wooden beads will be added to my product list very soon and I have plans in the future to expand into furniture, with coffee tables, bedside tables and bed heads.

The Future

I’m super excited to see where this new venture goes and I must say that it feels really great to finally be making money (however little it is) for all my hard work, it’s been a long time coming, haha.

Feel free to visit my store HERE and if you’d like to sign up to my store mailing list HERE, you’ll receive 10% off your first order, plus info on all my latest news, products & DIY articles, as well as exclusive discounts, and links to giveaway competitions. Alternatively, simply enter your name and email below and I’ll add you to the list!


Get your FREE Ebook

Accomplish more IN a fraction of the time

The pace and intensity of our lives, both at work and at home, leave many of us feeling like a person riding a frantically galloping horse. Our day-to-day incessant busyness — too much to do and not enough time.

With this ebook you will learn to approach your days in another way, reducing stress and getting results through prioritizing, leveraging and focus!

ebook button


86393114_559304881609182_2836440361268674560_nRustic/Farmhouse Serving/Storage Tray on Etsy


DIY Rustic Storage/Serving Tray

91165532_231409358006647_9124581651538509824_n

With all this staying at home and keeping away from other people, there can be days when all you want to do is kick back in bed or on the couch when it comes to brekkie, lunch or dinner. If you have kids, it’s more like supper time (when they are all in bed), or you might be lucky enough to have a gorgeous partner who will give you that odd sleep in, with brekkie in bed as a bonus. Either way, chances are there will likely be an occasion that calls for a serving tray.

But with strained finances being all too common right now, it can be too much of a luxury to justify purchasing one, plus it’s likely that many of the stores that sell them are closed, so popping down to the store to get one isn’t likely an option. However, did you know that you could make a serving tray out of recycled wood and other things you may have lying around the house or shed?

I made this serving tray from pallet wood and some brand new corner brackets I found in a drawer that obviously came with a piece of furniture (or perhaps a smart TV, for wall mounting) at some point in time. I couldn’t remember though, and so I decided to use them for this project. I didn’t just make a regular serving tray though, because why make an item that only has one use and sits in the cupboard waiting for the opportune time to make an appearance? This tray doubles as a storage tray, for all your organizing needs in the kitchen, dining room, study or bedroom and transforms into a handy serving tray, with the help of an insert.

Now you can make this tray exactly the way I did if you have all the same materials I used, or you can get creative and use what you have at home to make something similar. If your not much of a handyman and would rather buy one, and you have the funds, then you can purchase one from me, as I’ve just started selling these on my new Etsy store (and yes, I will definitely get a commission if you buy one, haha).

This page contains affiliate links that may earn me a commission (without any extra cost to you) if you click on a link and make a purchase. Please visit our privacy policy for more information. Affiliate links are how I keep this blog running, thank you.

86364350_491176148239224_1226746696730411008_n
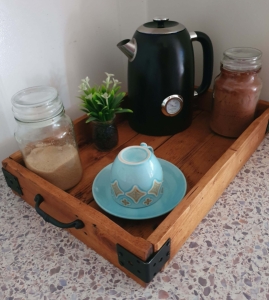
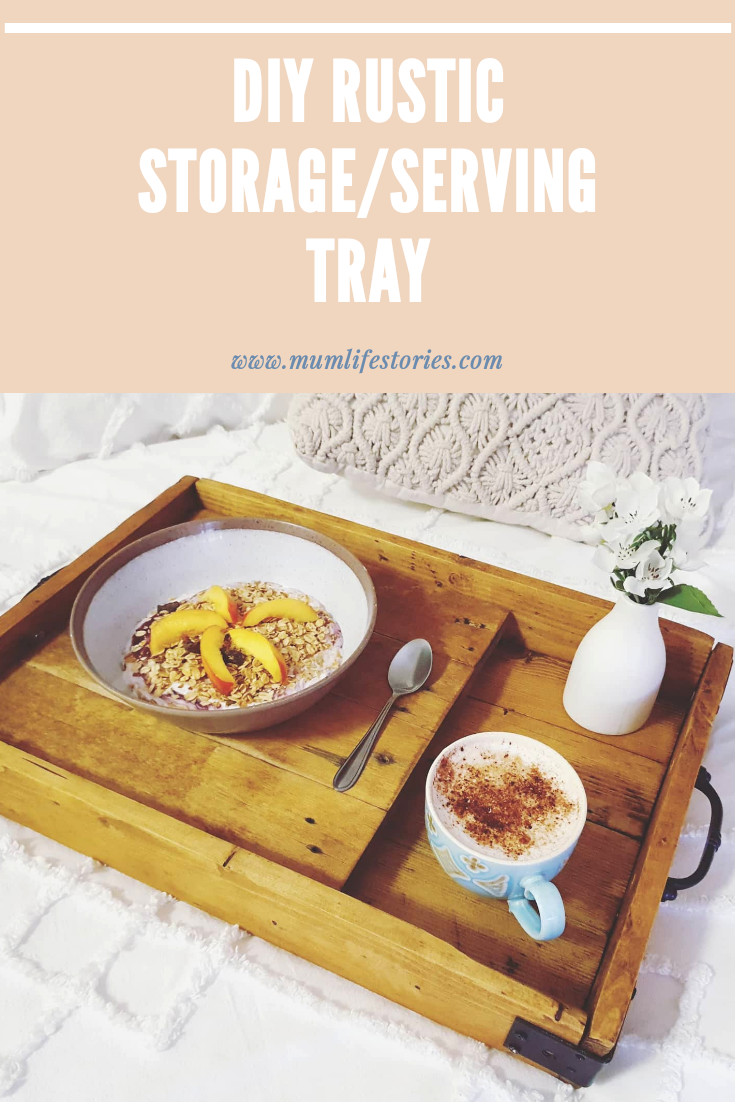
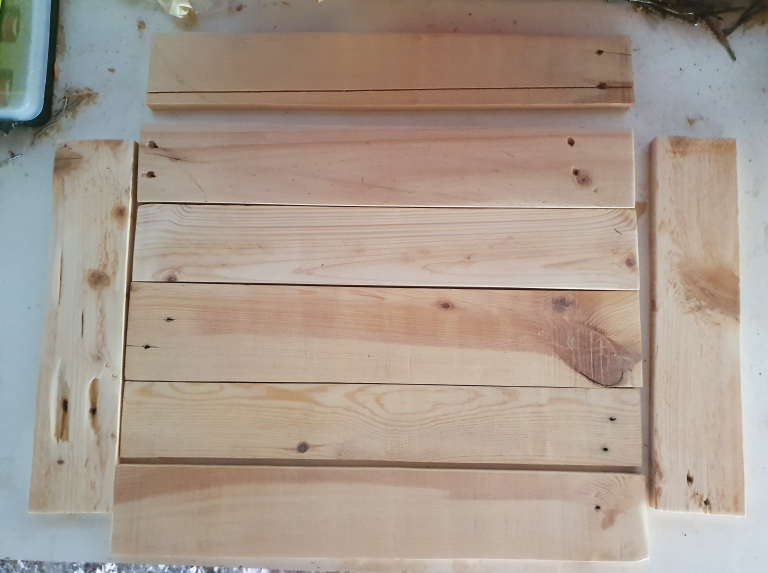
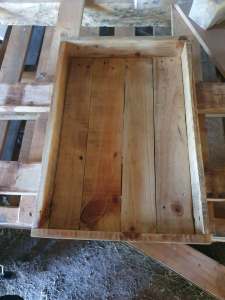
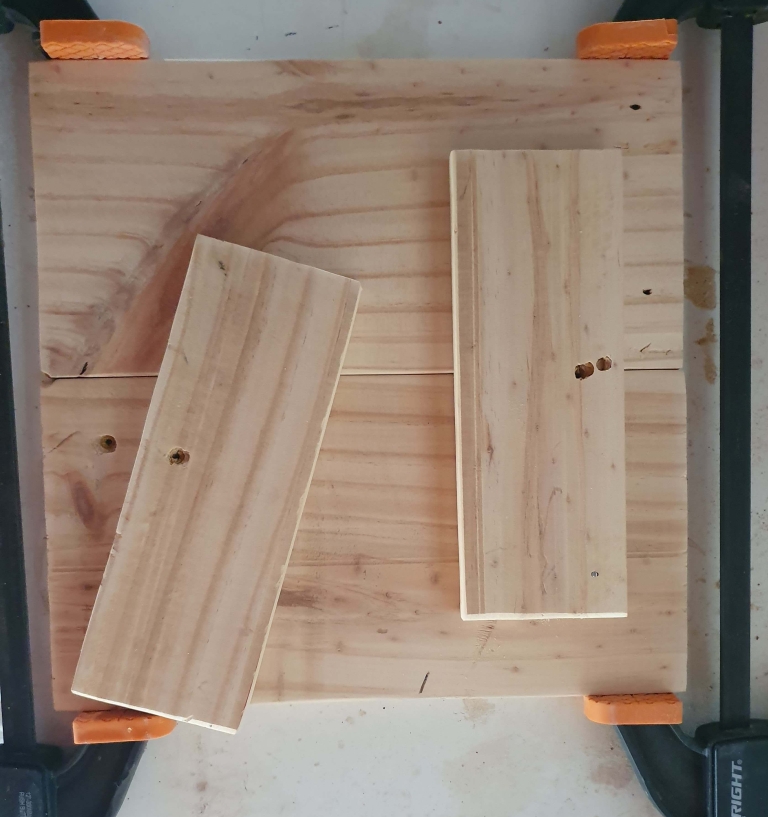
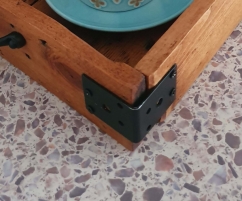
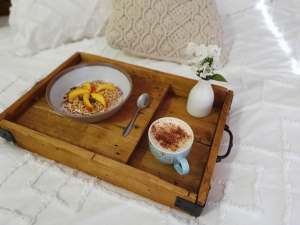
Rustic Storage/Serving Tray From Reclaimed Wood (Buy it Now)


Tools & Items you’ll need:

This is a list of the supplies and tools I used, and the links are suggestions of where you might buy these items online if you don’t have them already. For the sake of full disclosure, yes they are affiliate links.

Supplies:

  • Pallet wood (Heat-Treated only, should have an HT stamp on it), or any scrap wood that will do the job (as long as no chemicals have been spilled on them)
  • Nails 30 x 1.6mm (I use bullet head nails as they are harder to see in the finished product)
  • Small screws (black)
  • Steel Brackets (whichever size you like)
  • Drawer handles (From an old set of drawers or bought new)
  • Can of black spray paint
  • Wood stain (I used brown japan)
  • Boiled Linseed oil (or you can use tung oil)

Tools:


Instructions:

Step 1:

First, if you’re using pallet wood you’ll need to remove the wood from the pallet. I’ve tried a few different ways of doing this but by far the easiest way is to use a hammer. Stand the pallets up vertically and use the hammer to hit the wood away from the supporting beam. When there is a big enough gap, use the prong end of the hammer to lever the wood away from the supporting beam, repeat this for all nailed sections. If your feeling strong, you could also use a crowbar to lever them off the supporting beams or pallet blocks. Then hammer out all the nails.

I found a good article about choosing the right wood to use for DIY projects. You can read it HERE.

82410669_168042877875362_2392368703099371520_n

Step 2

Time to measure and cut. You can make this tray to any size you like, I went with 45cm x 30cm (on the inside) so the longer base pieces and longer side pieces were 45cm long. The two shorter side pieces needed to be 30cm plus the thickness of the two smaller side pieces. My wood was approximately 1.5cm thick so I needed to add an extra 3cm to each of the smaller side pieces.

Step 3

Sand your pieces back with an 80grit sandpaper first. I find the belt sander is a little faster than the orbital and great at getting down to the bare wood. Then I go over it with the orbital at 240grit.

82569480_182987246147415_2142199107354099712_n

This is what my cut and sanded wood looked like.

sanded wood

As you can see I used some pretty rough wood, as I was aiming for an authentic rustic look.

Step 4

Now for the nailing. Here is where a nail gun would come in handy and make the job a lot quicker, but that’s on my list of “tools to get next”, so I used a hammer and 30mm x 1.6mm bullet head nails. You could use wood glue on the bottom boards if you wanted to as well, but you would need to let the glue dry overnight before putting in the nails. I found it easiest to nail on the longer side pieces first, then work my way from there. I used a vice for some of it, to hold a base piece while I nailed a side piece to it.

87794799_197734981291145_5047298351960162304_n

The completed box is the storage tray, with sides 7cm high. This is a little high for a serving tray, so I made an insert that could hold a plate or bowl at a comfortable height.

Your insert will need to be slightly smaller than your inner measurement so mine was 29.5cm wide and I made it square so 29.5cm x 29.5cm.

Step 5

Try to use wood from the same pallet or similar wood to whatever you used for your tray. I didn’t have any wood from the same pallet left so I used wood from another pallet that was wider. I only needed two pieces to get the 29.5cm width I was after. Cut and sand your wood and cut two smaller pieces to fix to the bottom of your tray to raise it up. Like this:

87130181_495663711375850_4774305239874404352_n

Just a note: Only the right piece is in position, the left one should be parallel on the left side. I forgot to take a photo of the completed insert.

The idea is that they hold the two (or however many pieces you use) together. If you use more than 2 pieces for your insert, I would recommend gluing them together first, for extra strength before putting on the base pieces. These two base pieces are like feet, they hold the boards together and lift the tray at the same time so that your storage tray becomes a serving tray.

Step 6

Time to stain, with whatever stain you have chosen. I used brown japan but instead of painting it on as is, I added it to boiled linseed oil for a one-step application. Be sure to consult the directions on the back of the tin as to what ratio of stain to oil you use if you decide to go this way. I used a low ratio of stain to oil, so it came out quite light and I ended up doing three coats of stain and oil, with 24 hours drying time in-between. The next time I made one of these I used a higher ratio of stain and only had to do two coats of stain and oil. You should have at least two coats of the oil though in order to achieve the level of sealant you want.

Raw linseed oil is more natural but can take up to a week to dry completely and fully penetrate the wood. Boiled linseed oil has drying agents added so that it dries faster and makes the wood more durable and reduces the likelihood of a sticky finish. Boiled linseed oil as apposed to raw linseed oil, dries faster and lighter and is best for indoor or decor items (not recommended for food prep because of the drying agents), whereas raw linseed oil is better for outdoor items as it helps wood retain its natural moisture content while aiding water repellence and retards cracking and shrinking. It also improves and delays weathering (great for outdoor furniture).

Step 7

Once your last coat of sealant is dry, you’ll want to add your embellishments. I spray painted my brackets with black paint & primer in one before adding them to the corners of my tray and used small black screws.

86393114_559304881609182_2836440361268674560_n

I found the brackets were not only a great decorative feature but also served to re-enforce the joints to make the tray stronger and more durable.

Last but not least you want to add your handles. Measure out where your holes need to go and drill pilot holes on each side of your tray, before attaching your handles with the screws provided with your handles (if you bought them) or use flat tipped screws.

And now your tray with insert should be complete:


orbital sander

Bosch PEX 220 A Orbital Disc Sander (Buy it Now)


Thanks

I hope you enjoyed this article and found it useful. If you’d like to read more DIY articles, head to our DIY MUM page or sign up to the DIY MUM newsletter by filling in the form below.

If you’d like to receive our Mum Life Stories newsletter and keep up to date with all our latest news, stories and promos (including giveaways & writing competitions) then why not sign up to our MLS email list. You’ll also receive a FREE Ebook, exclusive to email subscribers. Click HERE or fill out the form below.

83130178_165785694758743_145881042404769792_n


Get your FREE Ebook

Accomplish more IN a fraction of the time

The pace and intensity of our lives, both at work and at home, leave many of us feeling like a person riding a frantically galloping horse. Our day-to-day incessant busyness — too much to do and not enough time.

With this ebook you will learn to approach your days in another way, reducing stress and getting results through prioritizing, leveraging and focus!

ebook button