How to Fix a Hole in Plasterboard on a Budget

How to Fix a Hole in Plasterboard on a Budget

Everyone knows that homes require a lot of maintenance. Things get old, they break down, kids do stuff (don’t think I need to explain that one), and life just happens. Home maintenance problems are a part of everyday life, a part we’d all rather live without, but part of it just the same, and they can be a real headache to deal with, and often cost a lot of money to fix. So it’s awesome that in this age of easily accessible information, we can always find helpful little articles on the internet about things like ‘how to fix a hole’ etc, turning us all into DIY geniuses! Or just mildly handy average Joe’s.

How to fix a hole in plasterboard


As a single parent to 5, there are a lot of challenges (yes, let’s call them that) which I am forced to deal with alone. Some of these challenges need to be sorted by someone qualified (or maybe semi-qualified if I’m on a tight budget), but more often than not, they are small problems that I can easily fix myself, or at least attempt to.

I look at these problems as welcome challenges, why?  Because:

  1. They force me to learn a new skill
  2. Doing it myself saves me money
  3. The sense of accomplishment that comes from doing it myself, can’t be beat
  4. Doing it myself saves me money (I put this one twice because it’s the most important)

Recently one of my rather tall, lanky teenage sons, fell and put his elbow through one of the plasterboard walls in our house, leaving a hole about 6cm x 5cm (2.3 in x 2.8 in) in size. Lucky I love him or he would have been evicted that very day (joking…or am I?)

At first I was rather perturbed, wondering how I would sort this out without spending a fortune hiring a handyman (or some good-looking but not so professional “handyman want-to-be” from Airtasker) to fix it for me, and where on earth I would find the time to do it. But, after thinking on it for a while, I realised this was a great opportunity to be creative and resourceful, or show how un-handy I truly was.  But, for this articles sake, let’s go with the former.

I realised I already had a few items lying around the house that could be useful, and I’d only need to spend a little bit of money (emphasis on the ‘little’) on the rest, which meant sticking to a budget would be easy. I wasn’t 100% sure my idea would work, which is often how I approach most of my projects, but once I had completed the job, I realised it was relatively cheap, easy and quick to do. I also discovered that little problems like this needn’t be scary and anxiety ridden, as more often than not, I have the ability and resourcefulness to take care of it, and since your reading this article, I’m betting you’re the kind of person that enjoys a challenge like this too.

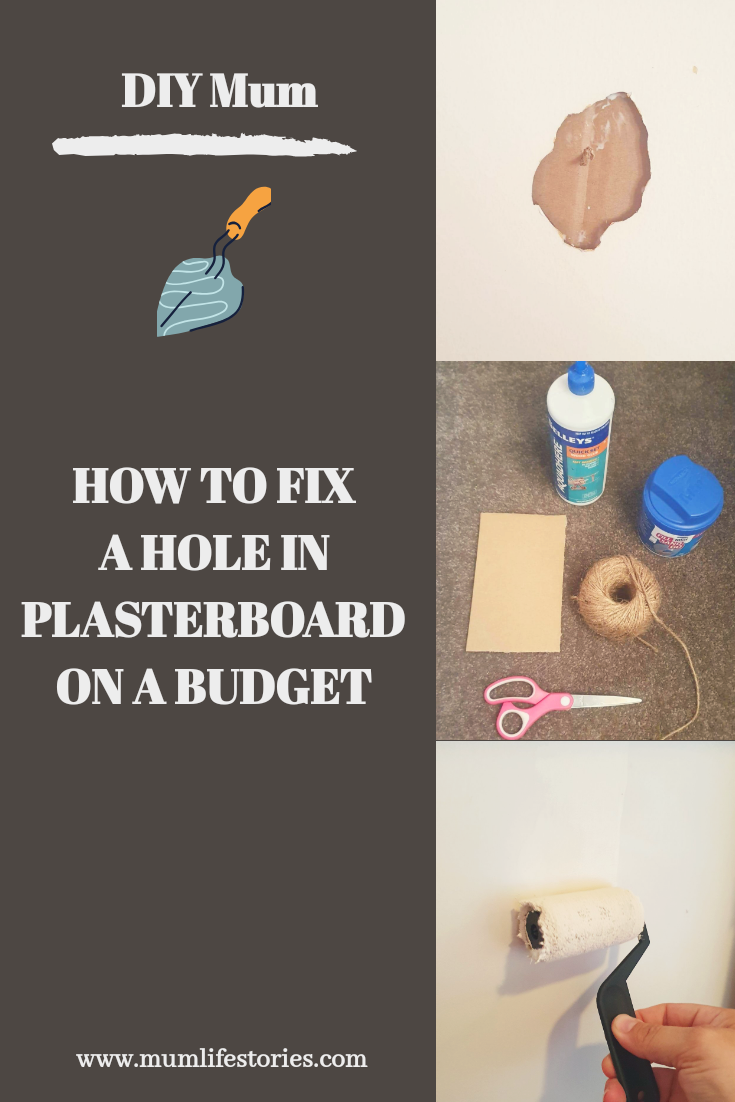
So here is my low-budget step-by-step guide on how to fix a hole in plasterboard, which anyone can do. Seriously, anyone can do it, and in hindsight I should have gotten my wall-smashing son to do it, but then I wouldn’t have had a project to write a DIY article about would I?

Please note: This is just one of the ways you can fix a hole in plasterboard, there are certainly other ways to do it, which may or may not be easier and/or cheaper but this is how I did it and I hope by sharing this method with you, it will help someone else save some time and money.

This page contains affiliate links that may earn me a commission (without any extra cost to you) if you click on a link and make a purchase. Affiliate links are how I keep this blog running, thank you.


Supplies:

This is a short list of the supplies I used, and I emphasise ‘short’ because you really don’t need a lot to do this job. The links next to them are suggestions of where you might buy these items online (in Australia and the UK) if you don’t have them already. Otherwise, all of these items should be available from your local hardware store.

  • Pair of scissors          AU     UK    USA
  • Quick-drying glue          AU     UK   USA
  • Cardboard (I just cut mine from a box)
  • String or twine          AU    UK   USA
  • Sandpaper sponge          AU     UK   USA
  • All-purpose filler          AU     UK   USA
  • Plastic applicator          AU     UK   USA
  • Small paint roller with tray         AU    UK   USA
  • Sample pot of paint


Instructions (How to fix a hole):

Step 1:

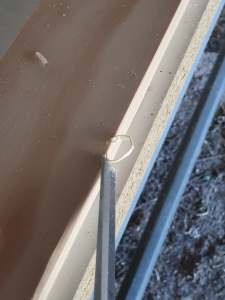
Being the busy (or should I say muddle-headed) mum that I am, I forgot to take a photo of the hole before I started the repair but if you’ve seen one hole, you’ve seen them all, right? I don’t need to show you what a hole in your plasterboard wall looks like, as I’m sure you are staring at that problem right now.

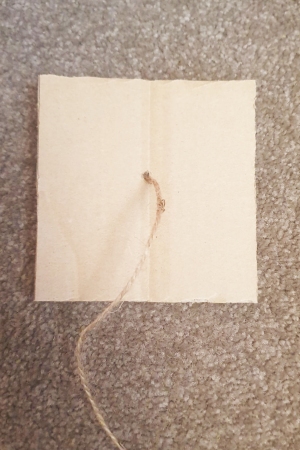
So, since I was using all-purpose filler, I needed something to cover the back of the hole so that the filler would have something to stick to and not just fall into the gap between the plasterboards, so I decided to use cardboard, cut from an old box. The next issue was how to get the cardboard onto the back of the hole, with no gaps. What I did was cut a square piece of cardboard slightly bigger on all sides than the hole. Then I poked a hole (yes, sometimes you need to make a hole to fix a hole) in the middle of the cardboard using the scissors, threaded through a piece of twine about 10 cm long and tied a knot at the back so the twine wouldn’t pull through. Yes I know, genius right? But it doesn’t end there.

131377870_145449770385541_1999700011553767377_n copy

Step 2

Next I put the glue (any quick-drying glue should work, I used wood glue I found in my workshop) around the edges of the cardboard on the side with the longest part of the string (so the pic you see above would be the ‘top’ of the cardboard) then folded the cardboard in the middle (trying not to touch the sides together) and inserted it into the hole and pulled on the string, adjusting the cardboard to make sure it covered the hole.

133667371_736839113927685_928853897202883639_n

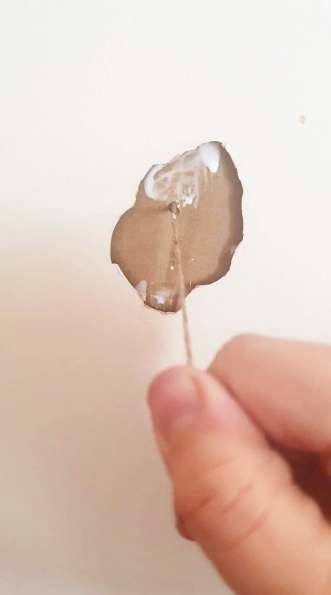
Make sure your glue is actually “quick-drying” unless you want to sit there all day, pulling on the string and waiting for it to dry. I mean you could do that if you want to, but make sure you have Netflix or some other streaming app installed on your phone before you start and that your phone is within reach. If you are smart enough (did I say that out loud) to use quick drying glue, it should be dry enough after a few minutes to let go of the string and snip it off just above the level of the cardboard.

cardboard in hole

Step 3

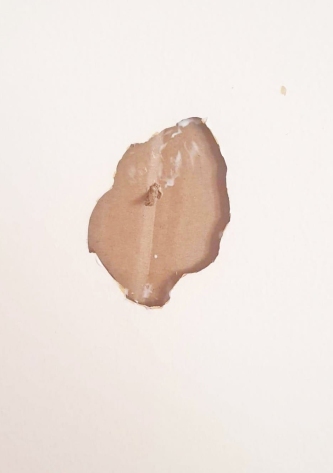
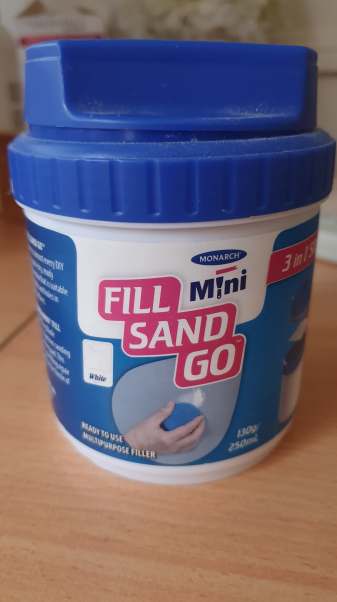
I left the glue to dry overnight, just to make sure it would stay in place when I filled it (or maybe just because I had other plans that afternoon, my memory is a little fuzzy), but with quick drying glue it should be good to go within about an hour or so (follow the instructions on the packaging). All-purpose or multi-purpose filler is a great option for this job, it’s quick drying and ready mixed and suitable for filling any small to medium cracks and holes in plasterboard and timber. I used Monarch Mini – Fill, Sand, Go from my local Bunnings store for $9.98. It came with it’s own sanding tool and applicator, so it took care of 3 of my supply needs in one little package.

133373991_444854646671781_7986383031827837897_n

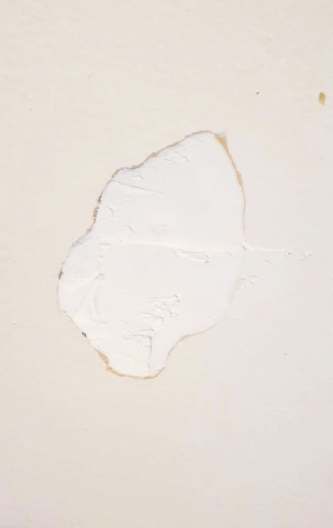
Using the applicator (make sure you buy one if your filler didn’t come with one), I applied a liberal amount of the filler to the hole. Since it was on the larger side of a medium-sized hole, I found that it was difficult to get it smooth and flush with the wall, so I had to fill it, let it dry, then fill it again. Now you won’t be able to get it perfectly smooth like the metaphorical babies backside, but that’s what the sanding tool is for. If you don’t get a filler that includes a sanding tool, you can just use a sanding sponge or a block of wood with some 240 (or higher) grit sandpaper wrapped around it. I gave it a quick sand to smooth it out and felt pretty good about how it polished up.

This is what it looked like before sanding. I didn’t forget a pic (this time) of the sanded finish but I forgot everything I ever learnt about photography and didn’t keep the camera still, and the pic was just too blurry to use.

135945625_413439973087159_1891871974428708554_n

Step 4

This is the final step and I think the most fun. You’ll need to take a decent-sized chip of paint from your wall to the hardware store (say roughly the size of your kids elbow) so they can colour-match the paint. Ask for a sample pot size, as you don’t need much paint, and it’s still enough to keep in case one of your kids decides to put a knee or foot or other extremity through the wall again.

I used my cute little roller and baby roller tray, to paint over my filler and make the patch up job completely disappear. Hermione Granger eat your heart out!

133660896_323660548760579_5220323643021779999_n

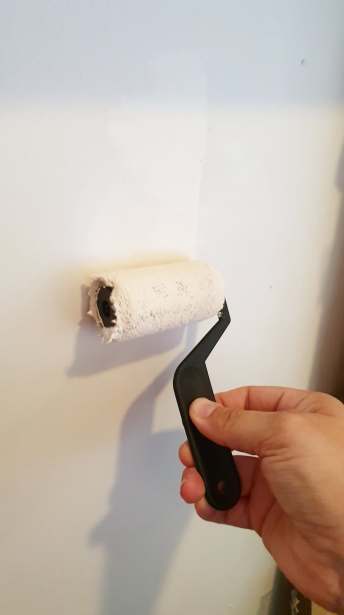
Once the paint dried, you couldn’t tell at all, that there had been a teenage elbow sized hole there for about 3 months (I may be a bit of a procrastinator).

The Budget

So there it is, a quick and easy and let’s not forget affordable way to fix a hole in plasterboard on a budget. All up this project cost me around $21 (paint, roller, multi-purpose filler) as opposed to $100 – $150 to pay someone else to gain that sense of ‘pride in my accomplishment’, that was rightfully mine. Hopefully this has helped you to solve one problem in your life that could have been a headache (or aneurysm waiting to happen) and kept you from wasting money that could be better spent elsewhere (for instance on elbow pads for your clumsy teen).


orbital sander

Bosch PEX 220 A Orbital Disc Sander (Buy it Now)


Thanks

I hope you enjoyed this article and found it useful. If you’d like to read more DIY articles, head to our DIY MUM page or sign up to the DIY MUM newsletter by filling in the form below.

If you’d like to receive our Mum Life Stories newsletter and keep up to date with all our latest news, stories and promos (including giveaways & writing competitions) then why not sign up to our MLS email list. You’ll also receive a FREE Ebook, exclusive to email subscribers. Click HERE or fill out the form below.


More DIY Articles…

83130178_165785694758743_145881042404769792_n

91165532_231409358006647_9124581651538509824_n


Get your FREE Ebook

Accomplish more IN a fraction of the time

The pace and intensity of our lives, both at work and at home, leave many of us feeling like a person riding a frantically galloping horse. Our day-to-day incessant busyness — too much to do and not enough time.

With this ebook you will learn to approach your days in another way, reducing stress and getting results through prioritizing, leveraging and focus!

ebook button


DIY Rustic Storage/Serving Tray

91165532_231409358006647_9124581651538509824_n

With all this staying at home and keeping away from other people, there can be days when all you want to do is kick back in bed or on the couch when it comes to brekkie, lunch or dinner. If you have kids, it’s more like supper time (when they are all in bed), or you might be lucky enough to have a gorgeous partner who will give you that odd sleep in, with brekkie in bed as a bonus. Either way, chances are there will likely be an occasion that calls for a serving tray.

But with strained finances being all too common right now, it can be too much of a luxury to justify purchasing one, plus it’s likely that many of the stores that sell them are closed, so popping down to the store to get one isn’t likely an option. However, did you know that you could make a serving tray out of recycled wood and other things you may have lying around the house or shed?

I made this serving tray from pallet wood and some brand new corner brackets I found in a drawer that obviously came with a piece of furniture (or perhaps a smart TV, for wall mounting) at some point in time. I couldn’t remember though, and so I decided to use them for this project. I didn’t just make a regular serving tray though, because why make an item that only has one use and sits in the cupboard waiting for the opportune time to make an appearance? This tray doubles as a storage tray, for all your organizing needs in the kitchen, dining room, study or bedroom and transforms into a handy serving tray, with the help of an insert.

Now you can make this tray exactly the way I did if you have all the same materials I used, or you can get creative and use what you have at home to make something similar. If your not much of a handyman and would rather buy one, and you have the funds, then you can purchase one from me, as I’ve just started selling these on my new Etsy store (and yes, I will definitely get a commission if you buy one, haha).

This page contains affiliate links that may earn me a commission (without any extra cost to you) if you click on a link and make a purchase. Please visit our privacy policy for more information. Affiliate links are how I keep this blog running, thank you.

86364350_491176148239224_1226746696730411008_n
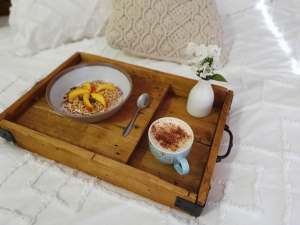
Rustic Storage/Serving Tray From Reclaimed Wood (Buy it Now)


Tools & Items you’ll need:

This is a list of the supplies and tools I used, and the links are suggestions of where you might buy these items online if you don’t have them already. For the sake of full disclosure, yes they are affiliate links.

Supplies:

  • Pallet wood (Heat-Treated only, should have an HT stamp on it), or any scrap wood that will do the job (as long as no chemicals have been spilled on them)
  • Nails 30 x 1.6mm (I use bullet head nails as they are harder to see in the finished product)
  • Small screws (black)
  • Steel Brackets (whichever size you like)
  • Drawer handles (From an old set of drawers or bought new)
  • Can of black spray paint
  • Wood stain (I used brown japan)
  • Boiled Linseed oil (or you can use tung oil)

Tools:


Instructions:

Step 1:

First, if you’re using pallet wood you’ll need to remove the wood from the pallet. I’ve tried a few different ways of doing this but by far the easiest way is to use a hammer. Stand the pallets up vertically and use the hammer to hit the wood away from the supporting beam. When there is a big enough gap, use the prong end of the hammer to lever the wood away from the supporting beam, repeat this for all nailed sections. If your feeling strong, you could also use a crowbar to lever them off the supporting beams or pallet blocks. Then hammer out all the nails.

I found a good article about choosing the right wood to use for DIY projects. You can read it HERE.

82410669_168042877875362_2392368703099371520_n

Step 2

Time to measure and cut. You can make this tray to any size you like, I went with 45cm x 30cm (on the inside) so the longer base pieces and longer side pieces were 45cm long. The two shorter side pieces needed to be 30cm plus the thickness of the two smaller side pieces. My wood was approximately 1.5cm thick so I needed to add an extra 3cm to each of the smaller side pieces.

Step 3

Sand your pieces back with an 80grit sandpaper first. I find the belt sander is a little faster than the orbital and great at getting down to the bare wood. Then I go over it with the orbital at 240grit.

82569480_182987246147415_2142199107354099712_n

This is what my cut and sanded wood looked like.

sanded wood

As you can see I used some pretty rough wood, as I was aiming for an authentic rustic look.

Step 4

Now for the nailing. Here is where a nail gun would come in handy and make the job a lot quicker, but that’s on my list of “tools to get next”, so I used a hammer and 30mm x 1.6mm bullet head nails. You could use wood glue on the bottom boards if you wanted to as well, but you would need to let the glue dry overnight before putting in the nails. I found it easiest to nail on the longer side pieces first, then work my way from there. I used a vice for some of it, to hold a base piece while I nailed a side piece to it.

87794799_197734981291145_5047298351960162304_n

The completed box is the storage tray, with sides 7cm high. This is a little high for a serving tray, so I made an insert that could hold a plate or bowl at a comfortable height.

Your insert will need to be slightly smaller than your inner measurement so mine was 29.5cm wide and I made it square so 29.5cm x 29.5cm.

Step 5

Try to use wood from the same pallet or similar wood to whatever you used for your tray. I didn’t have any wood from the same pallet left so I used wood from another pallet that was wider. I only needed two pieces to get the 29.5cm width I was after. Cut and sand your wood and cut two smaller pieces to fix to the bottom of your tray to raise it up. Like this:

87130181_495663711375850_4774305239874404352_n

Just a note: Only the right piece is in position, the left one should be parallel on the left side. I forgot to take a photo of the completed insert.

The idea is that they hold the two (or however many pieces you use) together. If you use more than 2 pieces for your insert, I would recommend gluing them together first, for extra strength before putting on the base pieces. These two base pieces are like feet, they hold the boards together and lift the tray at the same time so that your storage tray becomes a serving tray.

Step 6

Time to stain, with whatever stain you have chosen. I used brown japan but instead of painting it on as is, I added it to boiled linseed oil for a one-step application. Be sure to consult the directions on the back of the tin as to what ratio of stain to oil you use if you decide to go this way. I used a low ratio of stain to oil, so it came out quite light and I ended up doing three coats of stain and oil, with 24 hours drying time in-between. The next time I made one of these I used a higher ratio of stain and only had to do two coats of stain and oil. You should have at least two coats of the oil though in order to achieve the level of sealant you want.

Raw linseed oil is more natural but can take up to a week to dry completely and fully penetrate the wood. Boiled linseed oil has drying agents added so that it dries faster and makes the wood more durable and reduces the likelihood of a sticky finish. Boiled linseed oil as apposed to raw linseed oil, dries faster and lighter and is best for indoor or decor items (not recommended for food prep because of the drying agents), whereas raw linseed oil is better for outdoor items as it helps wood retain its natural moisture content while aiding water repellence and retards cracking and shrinking. It also improves and delays weathering (great for outdoor furniture).

Step 7

Once your last coat of sealant is dry, you’ll want to add your embellishments. I spray painted my brackets with black paint & primer in one before adding them to the corners of my tray and used small black screws.

86393114_559304881609182_2836440361268674560_n

I found the brackets were not only a great decorative feature but also served to re-enforce the joints to make the tray stronger and more durable.

Last but not least you want to add your handles. Measure out where your holes need to go and drill pilot holes on each side of your tray, before attaching your handles with the screws provided with your handles (if you bought them) or use flat tipped screws.

And now your tray with insert should be complete:


orbital sander

Bosch PEX 220 A Orbital Disc Sander (Buy it Now)


Thanks

I hope you enjoyed this article and found it useful. If you’d like to read more DIY articles, head to our DIY MUM page or sign up to the DIY MUM newsletter by filling in the form below.

If you’d like to receive our Mum Life Stories newsletter and keep up to date with all our latest news, stories and promos (including giveaways & writing competitions) then why not sign up to our MLS email list. You’ll also receive a FREE Ebook, exclusive to email subscribers. Click HERE or fill out the form below.

83130178_165785694758743_145881042404769792_n


Get your FREE Ebook

Accomplish more IN a fraction of the time

The pace and intensity of our lives, both at work and at home, leave many of us feeling like a person riding a frantically galloping horse. Our day-to-day incessant busyness — too much to do and not enough time.

With this ebook you will learn to approach your days in another way, reducing stress and getting results through prioritizing, leveraging and focus!

ebook button


How To Make A Rustic Pallet Bed Head

How To Make A Rustic Pallet Bed Head

83130178_165785694758743_145881042404769792_n

“You’ll Never Know What Your Capable Of Until You Try”

I have a confession to make… I’m in love with the word ‘rustic’.

Ever since I was a little girl I wanted to live in a treehouse. Not a literal treehouse, out in the backyard with one hobbit-sized room and a dangerously precarious, ladder. More like a house made almost entirely from reclaimed wood, surrounded by a forest of trees, far enough out of town that the only traffic you could hear would be the flocks of birds making their daily passings, but not so far out as to be isolated.

There is something about wood itself, something that reminds me of what is important. ‘Realness’ and what could be more real than wood? It’s natural, it’s raw, it’s beautiful, it’s real. But wood can sometimes come across as something it’s not, if it’s milled too much, perfectly cut and polished up (much like a woman with too much makeup) it can come across as ostentatious and anything but ‘real’.

When I think of the word ‘rustic’ I think of wood that has been made beautiful by it’s experience, much like a wise old lady. Wood that is still natural and earthy, raw and real, but damaged, changed by it’s circumstances, full of character and charm. It’s old and used but so full of potential. All it takes is some love and care and it can be brought back to a glorious state, made even more beautiful by it’s brokenness and imperfections.

There is something about the word ‘rustic’ that just makes me feel closer to nature, closer to a more peaceful, tranquil existence, closer to my dream house and dream life. So I decided a while back that I wanted everything in my home to be as ‘rustic’ as possible.

Now ‘rustic charm’ used to be the phrase given to decor that was simply and plainly made, but nowadays it can be quite the opposite. ‘Rustic charm’ as a decor style has become quite popular and stylish and therefore items made with a ‘rustic charm’ now often come with a hefty price tag.

But with a little creativity and determination, you can create your own ‘rustic’ furniture and decor at a fraction of the price. Take this bedhead for example. When I lived in Tassie I made one dream come true and finally purchased myself a king-size bed made from reclaimed wood. Unfortunately, I had to sell it just a few months later to move across the country again. I promised myself I would get my reclaimed wood bed back somehow, but I soon realized the price tag was beyond my reach.

After browsing Pinterest and Instagram and seeing the amazing results people had had with pallet wood, I decided I would try and make one of my own. Now I actually have something better. Something I made myself! At first, I wasn’t sure if I could do it but once I got started, I realized it wasn’t that difficult and all it takes is a little motivation.

I’m going to share with you the step by step process I used to make this rustic pallet bed head.

Now there are many ways to make a bed head and I am in no way a professional so I do not claim this is the best or easiest way to make a bed head, but this is how I did it. I read a few articles on how to do it but in the end, I simply used my head, figured it out and learned a few things along the way.

This page contains affiliate links that could potentially earn me a commission (at no extra cost to you) if you click through and make a purchase. Affiliate links are how I keep this blog running, thank you. 

86364350_491176148239224_1226746696730411008_n
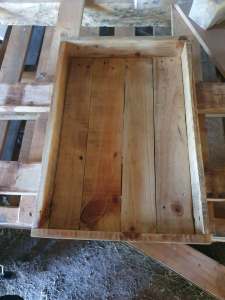
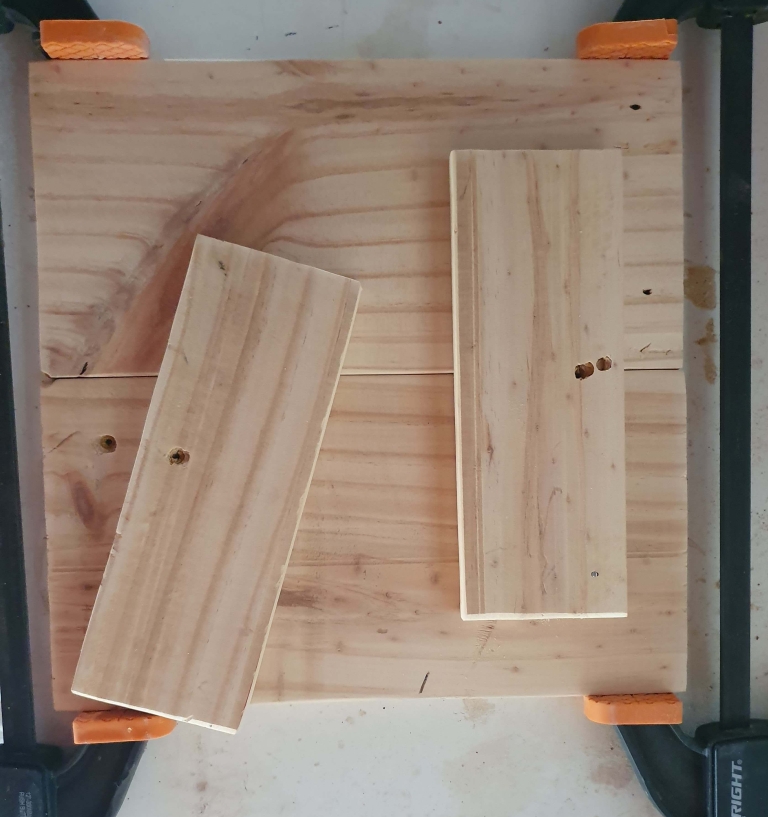
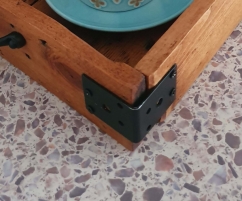
Rustic 2-in-1 Storage/Serving Tray (Buy it Now)


Tools and Supplies

Here’s a rough list of the tools and supplies I used (also a few links to where you can purchase these items) but you could also check your local hardware store.


71nXq041PDL._AC_SL1500_

Bosch Random Orbital Sander (Buy it Now)


Step 1:

Making a plan

Now I’m not great at creating plans or sticking to those plans, when I sew, I hand-sew and I do not use patterns etc, I just figure it out and wing it. Most of the time it’s successful but other times it ends up in the rubbish bin. If your into drawing up plans, then you’ll have no trouble working out the dimensions you need for your bedhead. One of the mistakes I made with this bedhead was that I originally planned to make an entire bed out of pallets and the pallet base was going to be a little wider than the mattress so you could see the base etc. But later on for various reasons, I decided to just make the bedhead and buy a simple base for the mattress. I forgot to adjust the measurements though so now my bedhead is wider than the frame and I have to place my heavy bedside tables against the posts to keep it up.

So, it’s a really good idea to know exactly what base you are using for your bedhead, then measure the width of your base so you know how wide your bedhead needs to be. Then decide on the height you’d like your bedhead to be. Draw up a plan with the measurements you took and work out what pattern you’d like with your boards. I went with a somewhat orderly pattern of 2,3,2,3,1,2,3,2,3,1.

There are sites on the internet that provide free plans for DIY furniture, you just need to research a little.

Step 2:

Finding the right pallets

If you’ve ever browsed Pinterest or youtube for DIY projects you will see a lot of people using pallets, for a couple of really good reasons.

  1. They are cheap, usually FREE on sites like Facebook marketplace, gumtree or another online marketplace, etc.
  2. They are perfect for that reclaimed, rustic look, nail holes and all.

But are all pallets good to use in your DIY project? The answer to that is NO. Some pallets have been chemically treated and are harmful to people, particularly when sanding and cutting etc and should never be used for furniture or decor items. The best pallets to use are those that are heat-treated, you will recognize them by the letters HT on the stamp somewhere on the pallet. Most pallets that have no stamp will be ok to use as well but if you don’t know where those pallets have come from and what they have been used for, it’s a good idea to stay away from them as they may have carried chemicals that could have spilled on the wood. Always avoid pallets with unidentifiable stains on them also.

There’s a really good article I came across while researching this, about how to identify usable pallets by their stamps.

You can read it here…

The pallets I used for this project were all heat treated and from a camping and fishing store.

Step 3:

Removing the wood from the pallets.

82810195_188476122300674_6852958055521320960_n

Now this is probably the hardest part of the job (in my opinion) and the most difficult as you need to be able to remove the boards without cracking the wood. It’s still possible to use the pieces (if the lengths you need are shorter than the planks, just use the uncracked part first and use a strong wood glue to seal a small crack) but of course the ideal is to use boards that don’t have cracks.

For this job I enlisted the help of my two 16-year-olds, as my muscles aren’t as strong as I’d like them to be. We used a crowbar to lift the ends off. You need to use a bit of technique here to wiggle the wood and nails out of the supporting piece. If you use too much force, the boards will crack, so go easy. We cracked a few, glued a few and put a few aside for projects that required shorter pieces.


Step 4:

Removing the nails

82804075_593682684540692_8751357660760113152_n
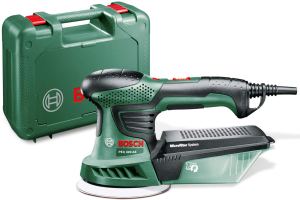
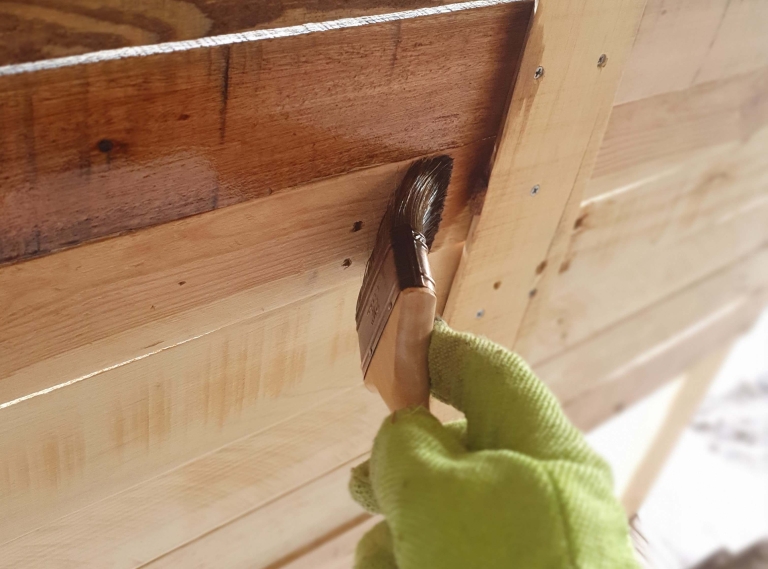
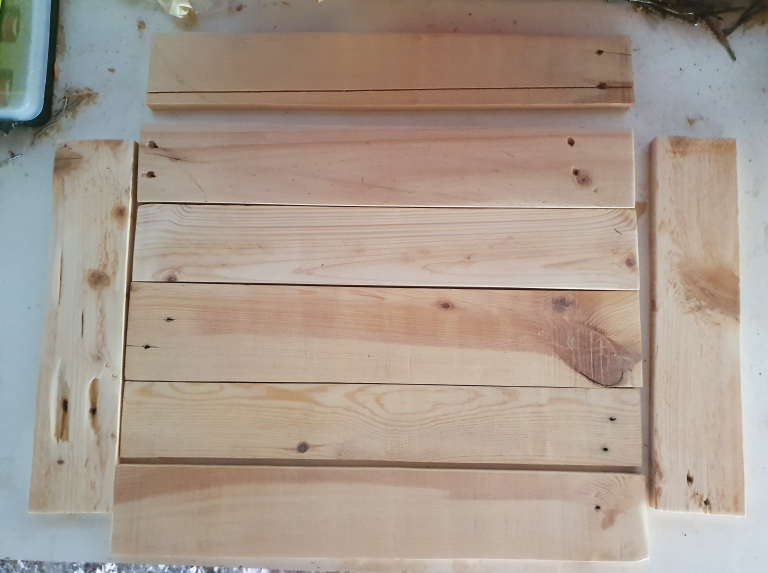
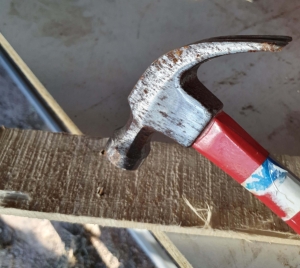
So of course your going to want to remove the nails from your wood before you start working with it and the easiest way to do this is to hammer them out from underneath then use the back of the hammer to lever them out the rest of the way.

This is easier said than done and some of the nails we came across were embedded pretty far into the wood. For those, I used a small chisel to dig away a little of the wood from around the nail heads so I could get the hammer end under the nail head enough to lever it out. Sometimes I needed to use pliers to finish off the job.

Step 5:

Cutting & Sanding

Next you’ll need to cut the wood to the right size. 82569480_182987246147415_2142199107354099712_n
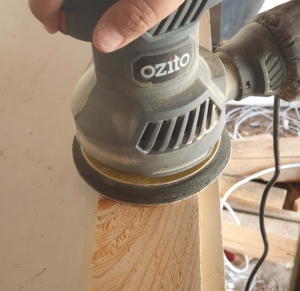
We used a circular saw to do this, but of course any electrical saw could do the job. It’s always a good idea to use safety glasses when cutting and sanding to prevent damage to your eyes should any wood chips fly up.

Once you’ve cut your pieces, give them a good sanding. You’ll need some clamps to clamp down your wood to a workbench or table. We alternated between a belt sander and a orbital sander. I didn’t know a lot about grit numbers when it came to sandpaper so it took me a while to do the sanding. I would now suggest using a coarse sand paper of maybe 80 – 100 grit to begin with and smoothing it off with a 120 – 240 grit. You can get finer grits than this that will give your wood a smoother finish but I think the rougher finish is in keeping with the ‘rustic’ look.

Step 6:

Building the frame

Now since I didn’t use a wood board backing, the frame is the first part that needed to be made. I didn’t have boards that were wide enough or straight enough for a solid frame so I bought some pieces of wood from Bunnings so that I would have a strong and straight frame. It was quicker and easier than hunting for more pallets with appropriately sized wood (without any bends). The only problem was that of course this wood did not look like reclaimed wood as it was brand-spanking new!

82227533_500473913967644_7544704736595804160_n

So I set to work with my chisel and sander to give it a used, rustic look. Chipping away edges, creating fake nail holes, scratching it hear and there and roughly sanding. The end result was quite authentic looking.

Now of course I would recommend using as much reclaimed wood as possible, but sometimes you have to cut corners and improvise to get the job done.

So we then set about nailing our top piece (which was exactly half the width of the side pieces) to the top of the side pieces (or legs) with a slight overhang on each end for creative styling.

Then we laid the frame down on the ground to get started with the pallet boards.

Step 7:

Building the headboard

83736864_470772110535343_1518725419690360832_n

So some of my pallet boards where less than perfect, in fact some of them had corners or edges missing so they were not complete pieces. I liked this as I felt it gave them an even greater ‘rustic’ look. I wanted the gaps to show, so having a backing board wouldn’t work for this project, but I needed something to nail my pallet boards into, especially since there would be 4 rows of 3 boards. So I had to cut and sand 3 more pieces of wood to go on the back for my boards to attach too.

I decided to make the bedhead from the back, so in other words I attached the supporting boards to the feature boards from behind rather than attaching the feature boards to the supporting boards from the front (so you can’t see any nails or screws on the front of the bedhead). I decided to use screws also instead of nails because it made for a quicker assembly and a stronger one I believe. I placed some loose wood boards under each supporting board to support the feature boards while I drove the screws in. They helped stabilize the bedhead on my uneven driveway as well.

This is what it looked like from the back, halfway through assembly.

83357921_878406942674222_7863397627855896576_n

and this is what it looked like from the back once completed.

83088199_172727153972917_7321478003274285056_n

The second mistake I made with this project was cutting my support boards too short, this meant that the bottom board was not attached to the supporting boards and the whole middle section kind of wobbled back and forth a little. I solved this problem by nailing the top part of the frame into the first row in two places where there were no gaps.

Step 8:

Finishing Off

With the construction side of the project finished, it was time for staining and finishing off. Now this was the first DIY project I had done so I knew very little about stains, varnishes, oils and waxes etc so I read the back of the tins to get the info I needed.


51zN++sCvtL._SX347_BO1,204,203,200_

Simple Farmhouse Life: DIY Projects for the All-Natural, Handmade Home


Stain

The stain I had bought was called ‘black Japan’, in the store it looked like the closest match to the stain on the bedside tables I already had. I would later discover that it wasn’t the same stain and that ‘walnut’ would have been more accurate, but it still came out looking awesome, so no big deal. I would suggest getting some sample cards to take home if your trying to match any furniture to a project, so you can get a more accurate match.

Primer

From reading the tins, I discovered that I would need to prime the wood first, given that pine is a porous wood. Primer can be applied directly to the wood or mixed with the stain for a one step primer and stain application, which is what I did.

One coat of primer and stain to both sides then let it dry for 24 hours. It looked like it needed a second coat of stain but I didn’t want to do another coat of primer so I mixed some more stain with some tung oil to seal the wood.

83005295_166954564581672_4246257071168684032_n

Tung Oil

You can use varnish if your after a smooth glossy look but I decided I’d prefer a matte finish so the tung oil was perfect for this. I did one coat of oil & stain, then wiped off the excess 60 minutes later, then let it dry for 24 hours. Then I applied another coat (just to the front) and followed the same process.

Wax

After the tung oil had dried, I rubbed beeswax into the front of the bedhead to give it a little bit of a sheen and to seal the wood further and protect it from mold and warping. The wax conditions the wood, making it resistant to water and other fluids.

83736864_470772110535343_1518725419690360832_n

Completed Project

So that’s how I made my very own rustic bedhead from wood pallets. I learnt a few lessons along the way and discovered that I quite enjoy making things out of recycled wood.

Finished K Bedhead 1 in room (no.2 sml)

Now that I have the bug, I have a few more DIY projects up my sleeve that I’ll be tackling over the next few months and blogging about. If you’d like to keep up-to-date with my latest DIY projects, simply sign up to my mailing list below. You’ll also receive all the latest news, stories and competitions (including giveaways and writing competitions) Plus a FREE ebook exclusive to email subscribers.


Get your FREE Ebook

Accomplish more IN a fraction of the time

The pace and intensity of our lives, both at work and at home, leave many of us feeling like a person riding a frantically galloping horse. Our day-to-day incessant busyness — too much to do and not enough time.

With this ebook you will learn to approach your days in another way, reducing stress and getting results through prioritizing, leveraging and focus!

ebook button